How to build and distribute beautiful command-line applications with PHP and Composer
Last updated: 2022-12-23 :: Published: 2022-01-31 :: [ history ]You can also subscribe to the RSS or Atom feed, or follow me on Twitter.
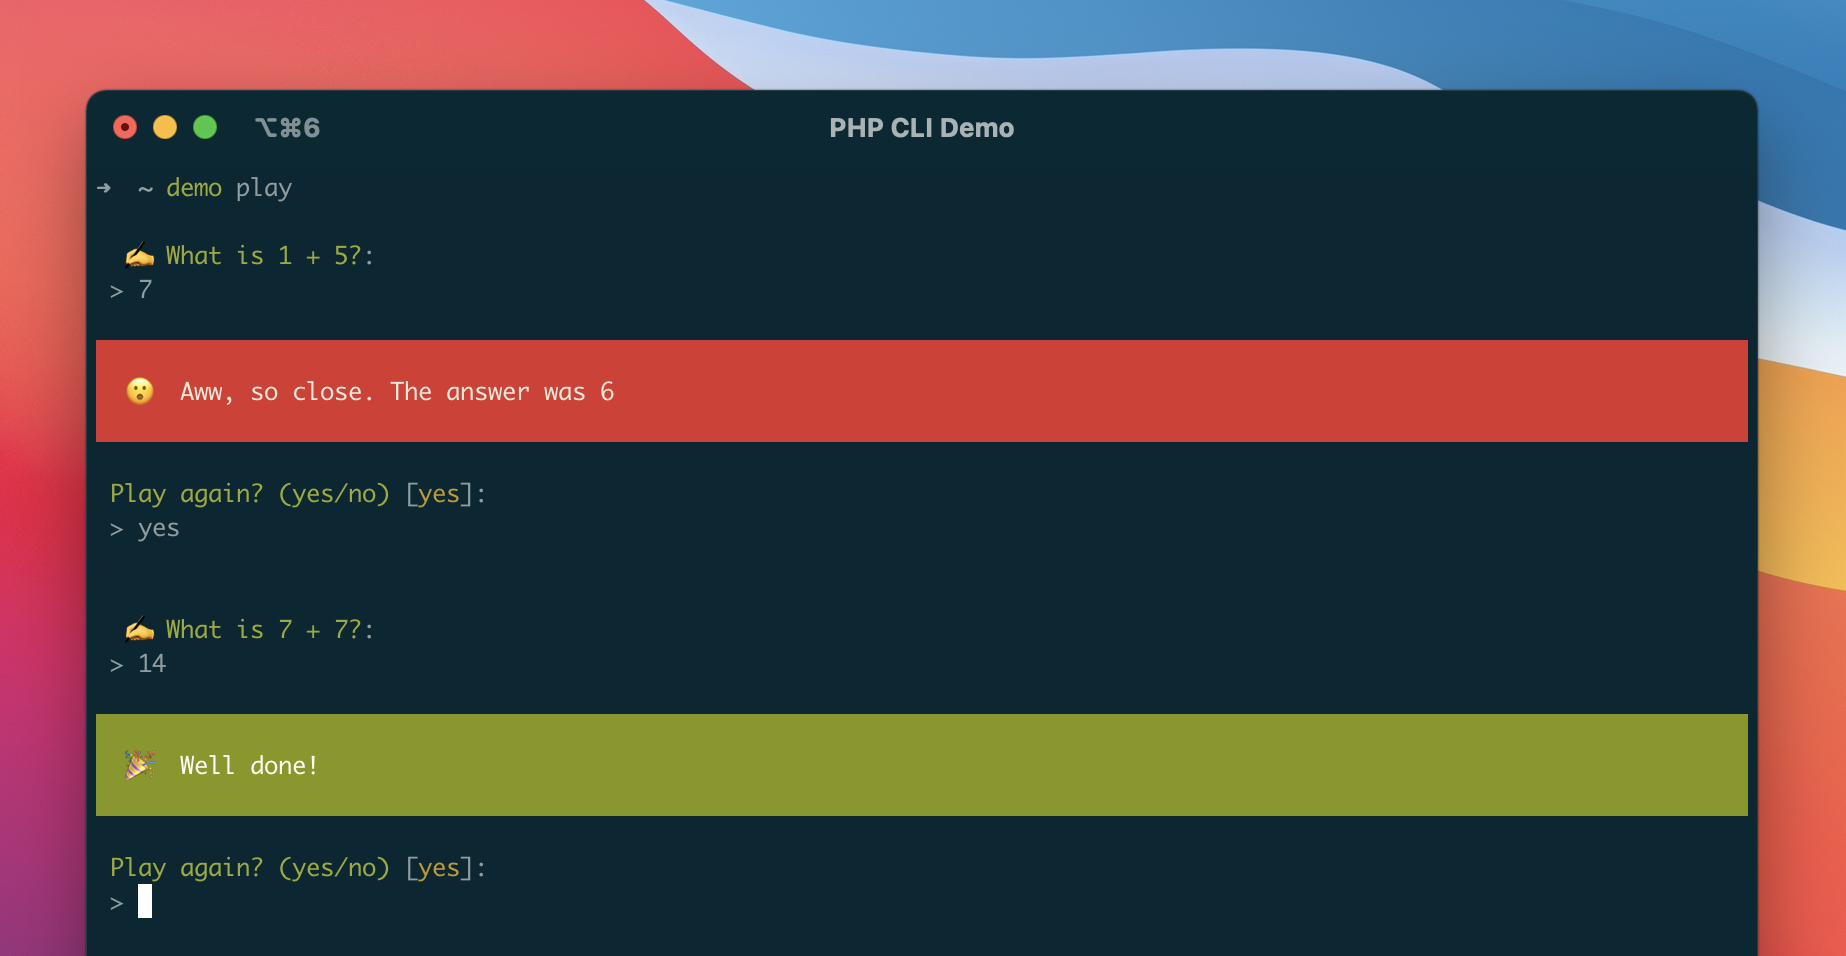
When you think of command-line applications, PHP doesn't immediately come to mind. Yet the language powers many popular tools, either as independent programs or to be used within projects.
Here are a few examples:
Be it through its vast ecosystem of libraries and frameworks, its ability to interact with the host, or the versatility of its dependency manager, PHP features everything you need to build and ship powerful CLI applications.
This tutorial will walk you through the process of creating a simple game running in the terminal, using Symfony's Console component as a bedrock, GitHub Actions for compatibility checking, and Composer for distribution.
We won't use specialised frameworks like Minicli or Laravel Zero because the goal is not so much to focus on features but to better understand the development, testing, and distribution phases of command-line programs.
You will find that you can build a lot of things on top of such a simple foundation, but you can always check out these frameworks later on, should you need extra capabilities.
In this post
Prerequisites
To complete this tutorial, you will need:
- A GitHub account (a free one will do)
- A local PHP instal
- A local Composer instal
- A terminal to interact with the above
If at any time you feel lost, you can also refer to this article's repository.
Repository and core dependencies
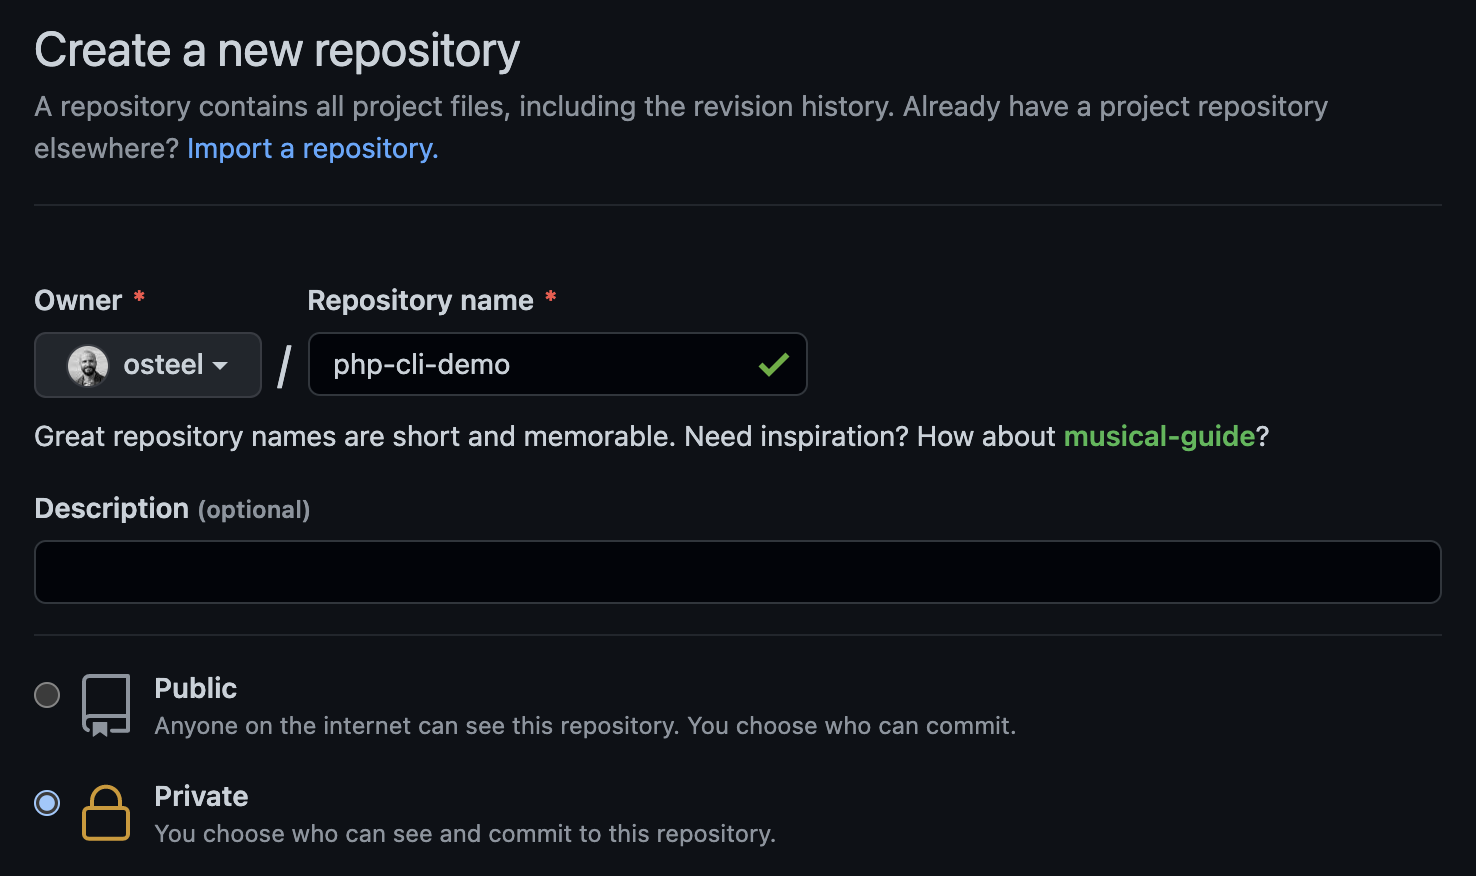
The first thing we need to do is create a GitHub repository named php-cli-demo (or anything you like, but the rest of this guide will refer to this name so it might be simpler to stick to it).
You can make the repository public straight away if you want, but I like to do so only when the code is pretty much ready. No matter what you choose, I will let you know when is a good time to make it public.
Next, open a terminal and clone the project locally, and enter its root directory:
$ git clone git@github.com:<YOUR GITHUB USERNAME>/php-cli-demo.git
$ cd php-cli-demo
Run the following command to create a composer.json file interactively:
$ composer init
It will ask you a series of questions – here is some guidance on how to answer them:
Package name (<vendor>/<name>): I distribute all my packages under the vendor nameosteel, so in my case, it'sosteel/php-cli-demo. If you're not sure, you can just pick your GitHub usernameDescription: shown as optional but will be required for distribution later on. You can set "PHP command-line tool demo"Author: make sure you set values that you are comfortable sharing publiclyMinimum stability: go forstable. You may sometimes need to pickdevinstead if some of your tool's dependencies aren't marked asstable(see here for details). That won't be the case in this tutorial thoughPackage type: chooselibrary(see here)License: this is up to you, but since the code will be distributed and available publicly, it has to be open source. MIT is fine in most cases, but if you need something more specific this guide will help. Make sure to set a value that is recognised by Composer, too. For this article,MITwill do
We will set our dependencies manually, so answer no when asked about defining them interactively. Keep the default value (src/) for PSR-4 autoload mapping.
The last question is about adding the vendor directory to the .gitignore file, to which you should reply yes.
That should be it for composer init – it will generate a composer.json file at the root of your project based on the values you've selected.
Before we instal any dependency, let's create a LICENSE file at the top of our project and paste the content of the chosen license in it (here's the MIT one – you will find the others here). Make sure to edit the placeholders for the name and year.
Let's now require Symfony's Console component as a dependency:
$ composer require symfony/console
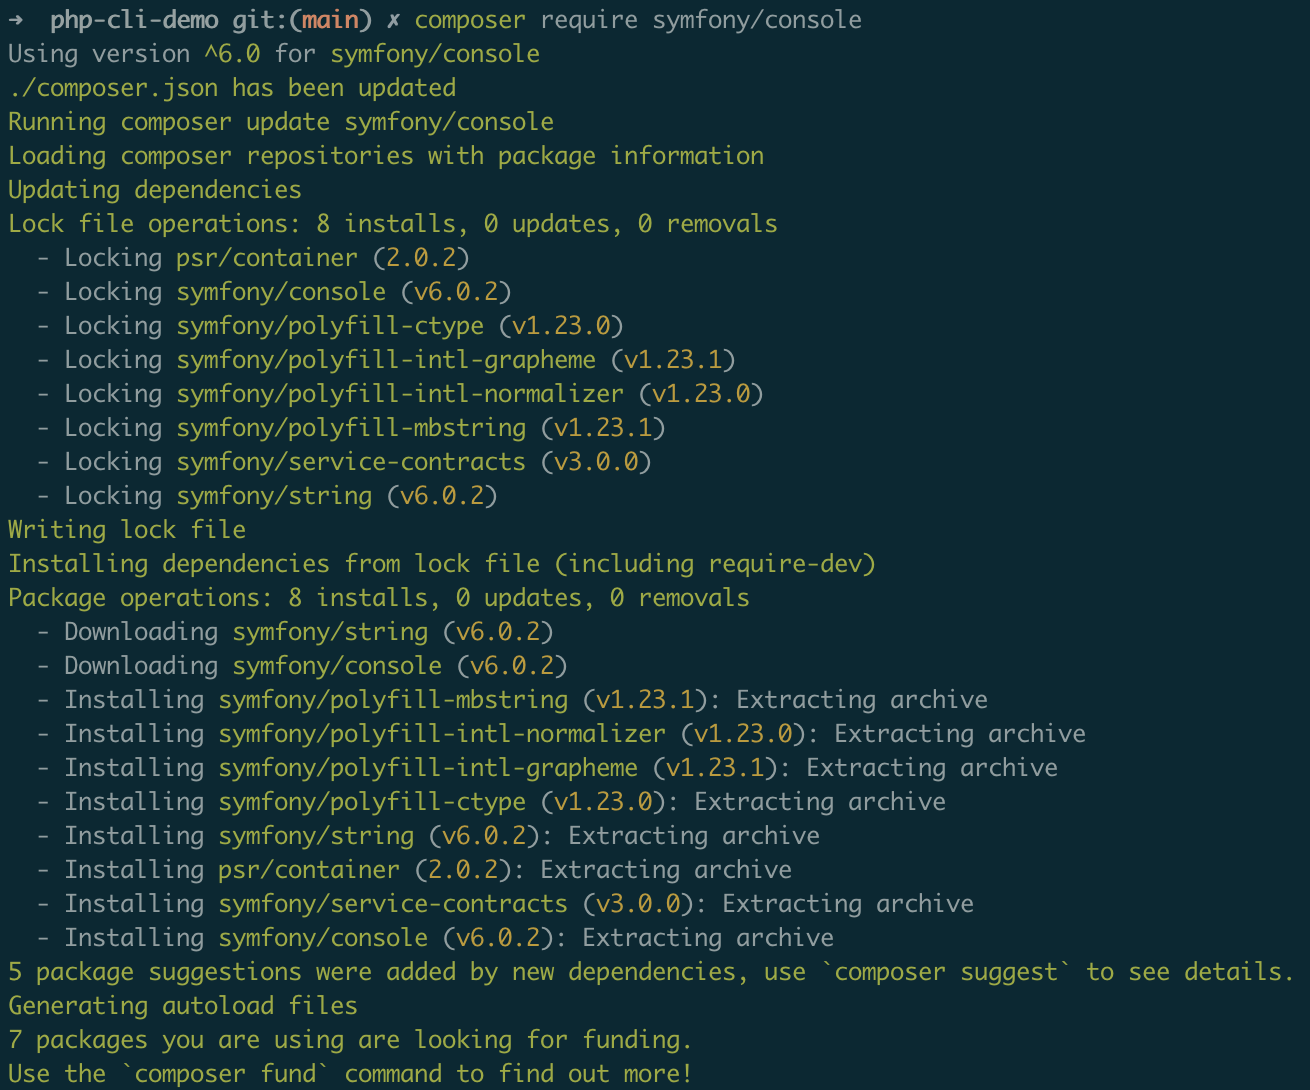
This component is used as a foundation for many frameworks' command-line features such as Laravel's Artisan. It's a robust and battle-tested set of classes for console applications and is pretty much a standard at this stage, so it makes sense to use it as a starting point instead of reinventing the wheel.
Once the script is done, you should see the dependency listed in the require section of composer.json (your version might be different based on when you're completing this tutorial):
"require": {
    "symfony/console": "^6.0"
},
Entry point
Console programs, like web applications, need an entry point through which all "requests" come through. In other words, we need an index.php for our commands.
To get started, we will reuse the example given in the Console component's documentation. Create a new folder named bin at the root of the project and add a demo file to it, with the following content:
1 2 3 4 5 6 7 8 9 10 11 12 | #!/usr/bin/env php
<?php
require __DIR__.'/../vendor/autoload.php';
use Symfony\Component\Console\Application;
$application = new Application();
// ... register commands
$application->run();
|
The demo file will be the entry point of our program, allowing us to call it from a terminal using commands like this one:
$ demo play
If you already have a local application named demo, give it a different name (if you're not sure, run which demo and see if it returns a path to an existing application).
Back to our demo file – notice the first line:
#!/usr/bin/env php
This is a way for the system to know which executable it should use to run the script, saving us from having to explicitly call it.
In other words, that's what will allow us to run this:
$ demo play
Instead of this:
$ php demo play
#!/usr/bin/env means the system will use the first php executable found in the user's PATH, regardless of its actual location (see here for details).
Speaking of execution, this will only work if demo is executable. Let's make sure that is the case:
$ chmod +x bin/demo
Now run the following commands:
$ php bin/demo
$ ./bin/demo
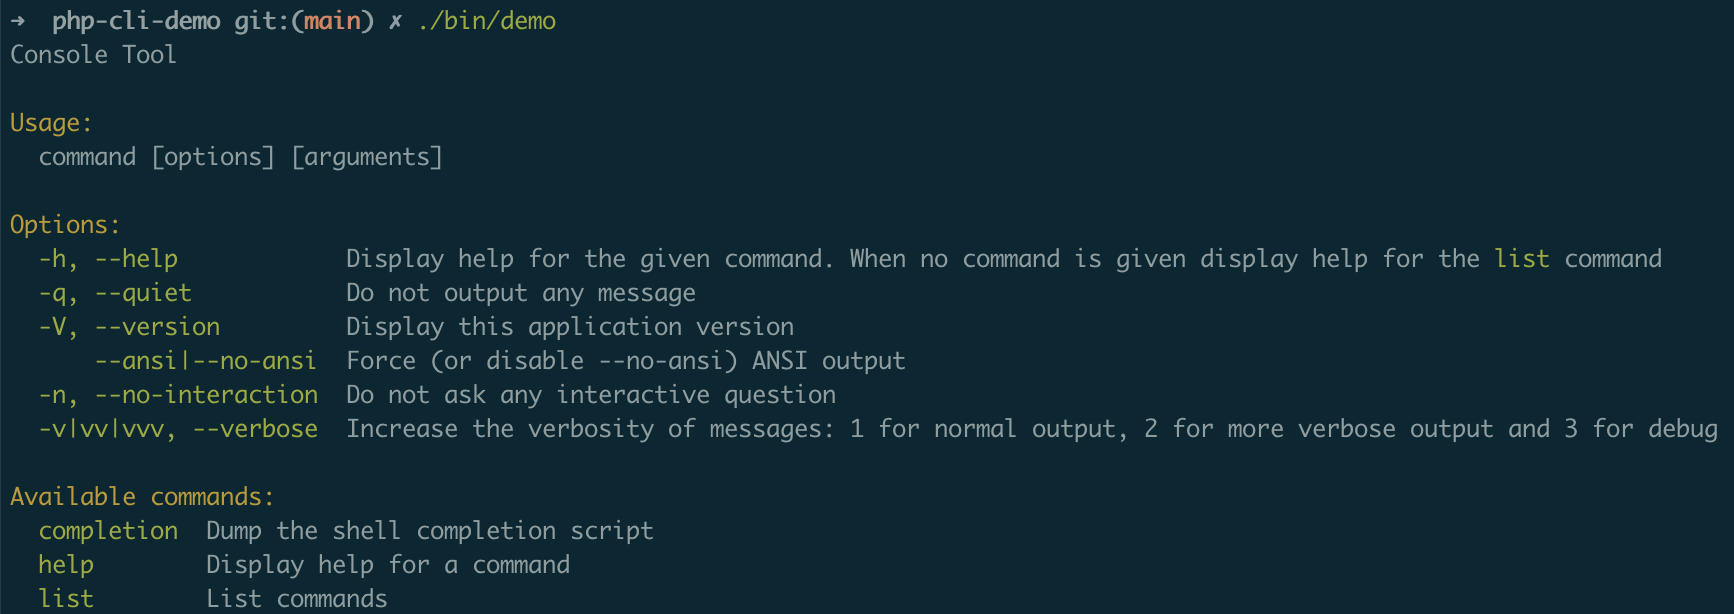
Both should display the default console menu:
Command
Now that the base structure of our application is in place, we can focus on the command that will contain the core of our program. What we're building is a simple game of calculation, giving the user basic sums to solve and returning whether the answer is correct or not.
Once again, the documentation provides some guidance on how to write commands, but for the sake of simplicity, I will give you the code straight away, followed by a breakdown.
Create some new folders src and src/Commands at the root of the project and add the following Play.php file to the latter:
1 2 3 4 5 6 7 8 9 10 11 12 13 14 15 16 17 18 19 20 21 22 23 24 25 26 27 28 29 30 31 32 33 34 35 36 37 38 39 40 41 42 43 44 45 46 47 48 49 50 51 52 53 54 55 | <?php
namespace Osteel\PhpCliDemo\Commands;
use Symfony\Component\Console\Command\Command;
use Symfony\Component\Console\Input\InputInterface;
use Symfony\Component\Console\Output\OutputInterface;
use Symfony\Component\Console\Style\SymfonyStyle;
class Play extends Command
{
/**
* The name of the command (the part after "bin/demo").
*
* @var string
*/
protected static $defaultName = 'play';
/**
* The command description shown when running "php bin/demo list".
*
* @var string
*/
protected static $defaultDescription = 'Play the game!';
/**
* Execute the command
*
* @param InputInterface $input
* @param OutputInterface $output
* @return int 0 if everything went fine, or an exit code.
*/
protected function execute(InputInterface $input, OutputInterface $output): int
{
$term1 = rand(1, 10);
$term2 = rand(1, 10);
$result = $term1 + $term2;
$io = new SymfonyStyle($input, $output);
$answer = (int) $io->ask(sprintf('What is %s + %s?', $term1, $term2));
if ($answer === $result) {
$io->success('Well done!');
} else {
$io->error(sprintf('Aww, so close. The answer was %s', $result));
}
if ($io->confirm('Play again?')) {
return $this->execute($input, $output);
}
return Command::SUCCESS;
}
}
|
Make sure to change the namespace at the top to reflect your vendor name.
Our class extends Symfony Console's Command class and overwrites some of its static properties. $defaultName and $defaultDescription are the command's name and description, which will both appear in the application's menu. The former will also allow us to invoke the command in the terminal later on.
Next comes the execute method, that the parent class requires us to implement. It contains the actual logic for the game and receives an instance of the console's input and output.
There are several ways to interact with those and I admittedly find the official documentation a bit confusing on the topic. My preferred approach is to rely on the SymfonyStyle class because it abstracts away most typical console interactions and I like the default style it gives them.
Let's take a closer look at the body of the execute method:
<?php

// ...

$term1 = rand(1, 10);
$term2 = rand(1, 10);
$result = $term1 + $term2;

$io = new SymfonyStyle($input, $output);

$answer = (int) $io->ask(sprintf('What is %s + %s?', $term1, $term2));

if ($answer === $result) {
    $io->success('Well done!');
} else {
    $io->error(sprintf('Aww, so close. The answer was %s', $result));
}

if ($io->confirm('Play again?')) {
    return $this->execute($input, $output);
}

return Command::SUCCESS;
First, we randomly generate the two terms of the sum and calculate the result in advance. We instantiate SymfonyStyle, pass the console's input and output to it and use it to display the question and request an answer (with the ask method).
What the heck is sprintf? If you're unfamiliar with sprintf, it's a PHP function allowing developers to format strings in a way that I find easier to read than the standard concatenation operator (.). Feel free to use the latter instead, though.
We collect and save the answer in the $answer variable, cast it to an integer (inputs are strings by default), and compare it to the expected result. If the answer is correct, we display a success message; if not, we display an error.
We then ask the user if she wants to play another round, this time using the confirm method since we need a boolean answer ("yes" or "no").
If the answer is "yes", we call the execute method recursively, essentially starting the game over. If the answer is "no", we exit the command by returning Command::SUCCESS (a constant containing the integer 0, which is a code signalling a successful execution).
The returned value is a way to tell the console whether the program executed correctly or not, and has nothing to do with the answer being right or wrong. These exit codes are standardised and anything other than 0 usually means "failure". You can see here which exit codes the Command class defines by default and come up with your own if you need to.
The above breakdown is more than enough for this article, but feel free to check out the official documentation for details and advanced command usage.
We now need to register our command to make it available from the outside. Update the content of the bin/demo file to match the following:
1 2 3 4 5 6 7 8 9 10 11 12 | #!/usr/bin/env php
<?php
require __DIR__.'/../vendor/autoload.php';
use Osteel\PhpCliDemo\Commands\Play;
use Symfony\Component\Console\Application;
$application = new Application();
$application->add(new Play());
$application->run();
|
The only thing we've changed is we now pass an instance of our command to the application before running it (again, don't forget to update the namespace of the imported class).
Go back to your terminal and run this from the project's root:
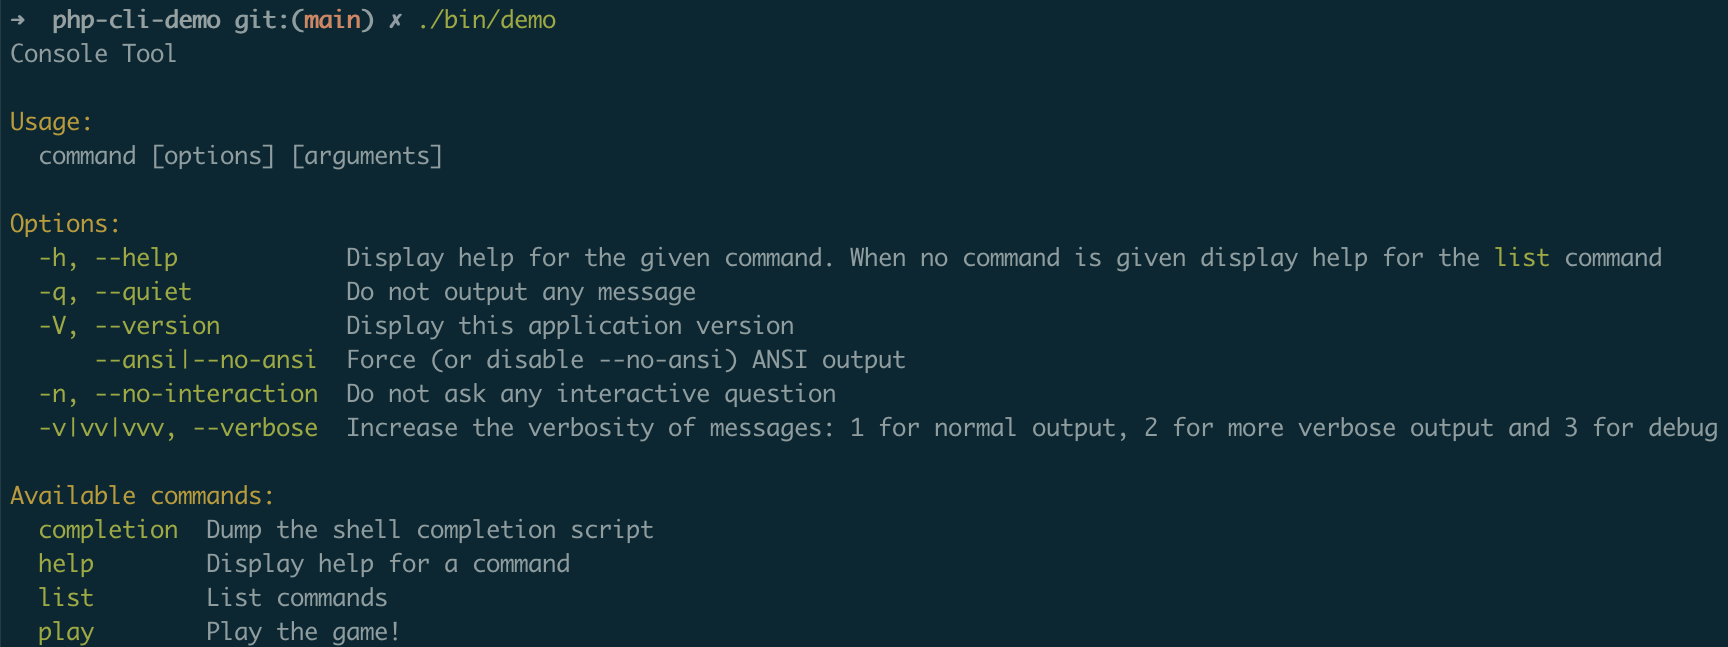
$ ./bin/demo
The help menu should display again, only this time the play command should be part of it, alongside its description:
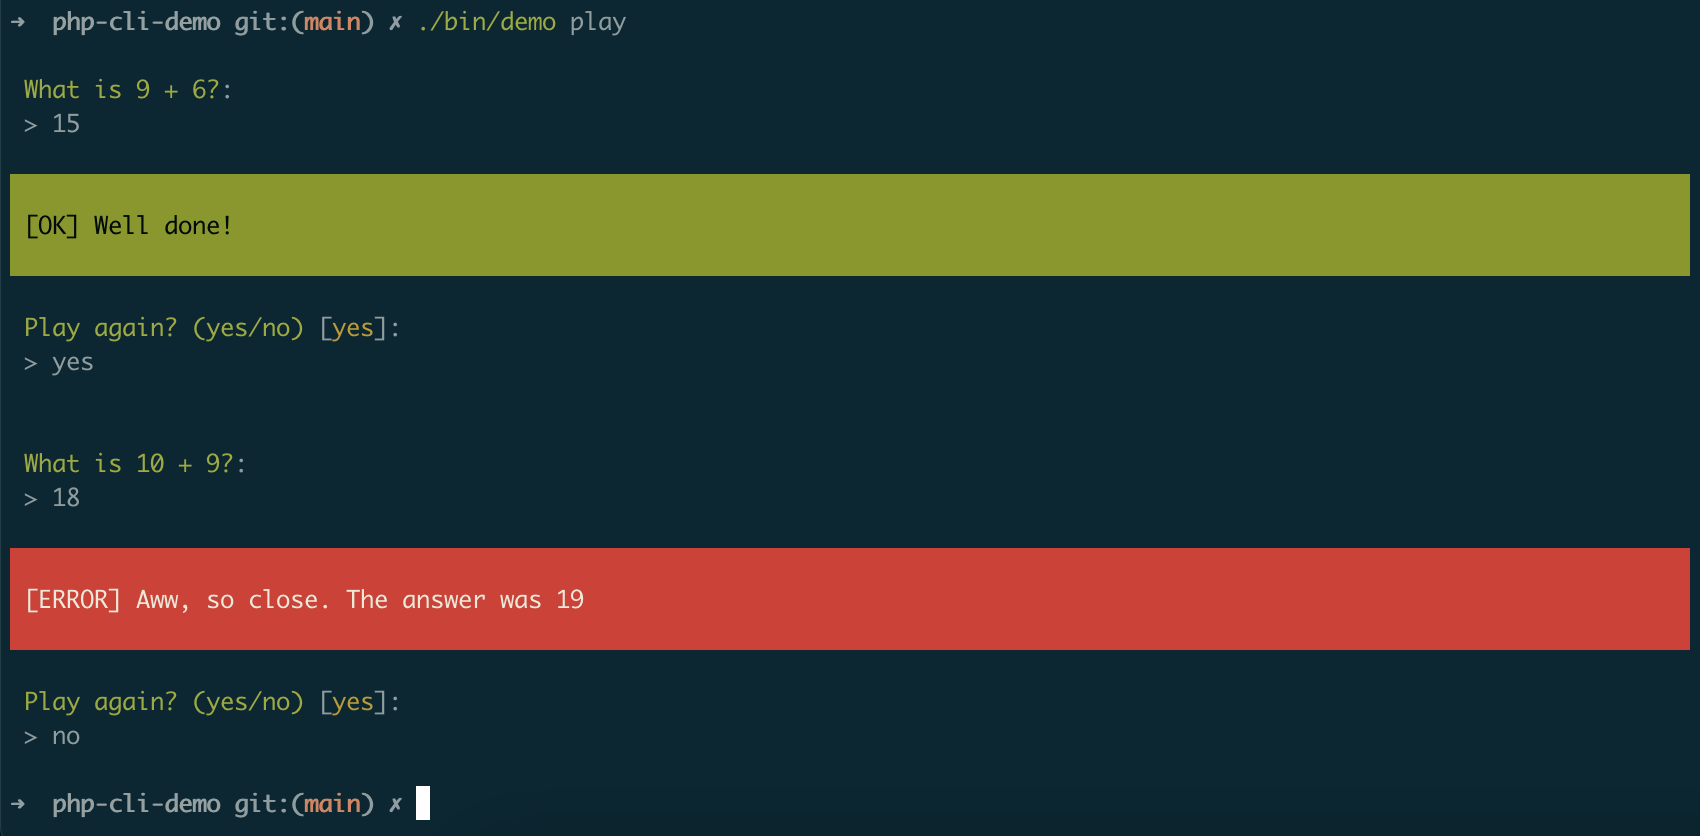
We should now be able to play the game, so let's give it a try:
$ ./bin/demo play
Make sure it behaves as you would expect – if it doesn't, go back a few steps or take a look at the tutorial's repository to check if you missed something.
Single command applications As our application will expose a single command play, we could also have made it the default one:
$command = new Play();
$application = new Application();

$application->add($command);
$application->setDefaultCommand($command->getName());
$application->run();
Doing so would have allowed us to start the game by running demo instead of demo play.
Styling the output
The defaults provided by the SymfonyStyle class are quite good already, but these [OK] and [ERROR] messages are a bit dry and not very suitable for a game.
To make them a bit more user-friendly, let's create a new Services folder in src, and add the following InputOutput.php file to it:
1 2 3 4 5 6 7 8 9 10 11 12 13 14 15 16 17 18 19 20 21 22 23 24 25 26 27 28 29 30 31 32 | <?php
namespace Osteel\PhpCliDemo\Services;
use Symfony\Component\Console\Style\SymfonyStyle;
class InputOutput extends SymfonyStyle
{
/**
* Ask a question and return the answer.
*/
public function question(string $question): string
{
return $this->ask(sprintf(' ✍️ %s', $question));
}
/**
* Display a message in case of right answer.
*/
public function right(string $message): void
{
$this->block(sprintf(' 🎉 %s', $message), null, 'fg=white;bg=green', ' ', true);
}
/**
* Display a message in case of wrong answer.
*/
public function wrong(string $message): void
{
$this->block(sprintf(' 😮 %s', $message), null, 'fg=white;bg=red', ' ', true);
}
}
|
Once again, make sure to change the vendor namespace at the top.
The purpose of this class is to extend SymfonyStyle to adapt its behaviour to our needs.
The program interacts with the player in three ways – it asks questions and indicates whether an answer is right or wrong.
I've reflected this in the InputOutput class above by creating three public methods – question, right, and wrong. question simply calls the parent class' ask method and prepends the question with the ✍️ emoji.
For right and wrong, I drew inspiration from the parent class' success and error methods and adapted their content to replace the default messages with more convivial emojis.
And that's all there is to it – the only thing left is to adapt the Play command to use our new service instead of SymfonyStyle:
1 2 3 4 5 6 7 8 9 10 11 12 13 14 15 16 17 18 19 20 21 22 23 24 25 26 27 28 29 30 31 32 33 34 35 36 37 38 39 40 41 42 43 44 45 46 47 48 49 50 51 52 53 54 55 | <?php
namespace Osteel\PhpCliDemo\Commands;
use Osteel\PhpCliDemo\Services\InputOutput;
use Symfony\Component\Console\Command\Command;
use Symfony\Component\Console\Input\InputInterface;
use Symfony\Component\Console\Output\OutputInterface;
class Play extends Command
{
/**
* The name of the command (the part after "bin/demo").
*
* @var string
*/
protected static $defaultName = 'play';
/**
* The command description shown when running "php bin/demo list".
*
* @var string
*/
protected static $defaultDescription = 'Play the game!';
/**
* Execute the command
*
* @param InputInterface $input
* @param OutputInterface $output
* @return int 0 if everything went fine, or an exit code.
*/
protected function execute(InputInterface $input, OutputInterface $output): int
{
$term1 = rand(1, 10);
$term2 = rand(1, 10);
$result = $term1 + $term2;
$io = new InputOutput($input, $output);
$answer = (int) $io->question(sprintf('What is %s + %s?', $term1, $term2));
if ($answer === $result) {
$io->right('Well done!');
} else {
$io->wrong(sprintf('Aww, so close. The answer was %s', $result));
}
if ($io->confirm('Play again?')) {
return $this->execute($input, $output);
}
return Command::SUCCESS;
}
}
|
As usual, pay attention to namespaces.
Let's play the game again and appreciate the new look:
$ ./bin/demo play
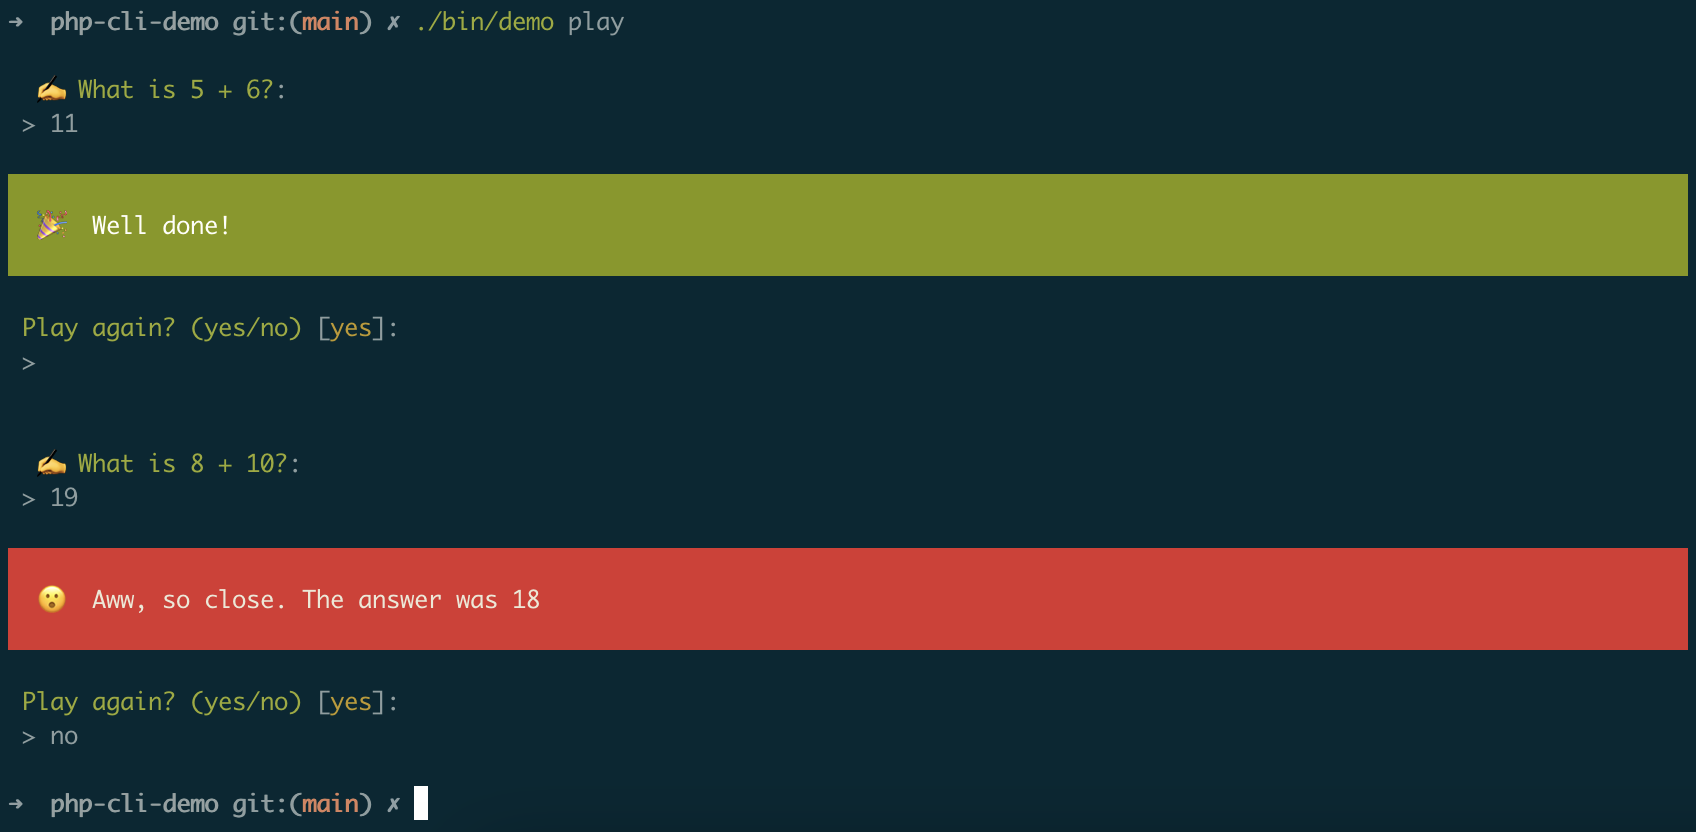
Bit nicer, isn't it?
Now, you might be wondering why I created new methods instead of extending the ask, success and error methods. The quick answer is that doing so increases compatibility across library versions.
Extending a method means the signature of the child method must be identical to that of the parent (with some subtleties), which is fine as long as the parent class doesn't change. For the sake of portability, however, we want our application to be compatible with various PHP and dependency versions, and in the case of the Console component, method signatures vary from one major version to another.
In short, creating new methods instead of extending existing ones allows us to avoid errors related to signature mismatch across versions.
The above is a quick example of how you can customise the style of console outputs. It also gives you an idea of how you can structure your application, with the introduction of the Services folder where you can put utility classes to decouple your code.
Concerning styling, if you need to push the appearance of your console program a bit further, you might want to take a look at Termwind, a promising new framework described as "Tailwind CSS, but for PHP command-line applications".
Distribution test
Let's now take a few steps towards the distribution of our application. First, we need to tweak our demo script:
1 2 3 4 5 6 7 8 9 10 11 12 13 14 15 16 17 18 | #!/usr/bin/env php
<?php
$root = dirname(__DIR__);
if (! is_file(sprintf('%s/vendor/autoload.php', $root))) {
$root = dirname(__DIR__, 4);
}
require sprintf('%s/vendor/autoload.php', $root);
use Osteel\PhpCliDemo\Commands\Play;
use Symfony\Component\Console\Application;
$application = new Application();
$application->add(new Play());
$application->run();
|
The bit we've updated is the following:
<?php

// ...

$root = dirname(__DIR__);

if (! is_file(sprintf('%s/vendor/autoload.php', $root))) {
    $root = dirname(__DIR__, 4);
}

require sprintf('%s/vendor/autoload.php', $root);
We're now looking for the autoload.php file in two different places. Why? Because this file will be located in different folders based on whether we're in development mode or distribution mode.
So far we've used our application in the former mode only, so we knew exactly where the vendor folder was – at the project's root. But once it'll be distributed (installed globally on a user's system), that folder will be located a few levels above the current one.
Here's for instance the path to the application's bin folder on my system, once I've installed it globally:
~/.composer/vendor/osteel/php-cli-demo/bin
And here is the path to the global autoload.php file:
~/.composer/vendor/autoload.php
The path to /vendor/autoload.php is then four levels above bin, hence the use of dirname(__DIR__, 4) (this function returns the path of the given directory's parent, which here is the parent of the current directory __DIR__. The second parameter is the number of parent directories to go up).
Save the file and make sure you can still access the application by displaying the menu:
$ ./bin/demo
The $_composer_autoload_path global variable Since Composer 2.2, a $_composer_autoload_path global variable containing the path to the autoloader is available when running the program globally.
This variable would allow us to simplify the above script, but also means we'd have to enforce the use of Composer 2.2 as a minimum requirement, potentially impacting compatibility.
Another thing we need to do is add composer.lock to the .gitignore file:
/vendor/
composer.lock
If you come from regular PHP application development, you may be used to committing this file to freeze dependency versions (also called dependency pinning), thus guaranteeing consistent behaviour across environments. When it comes to command-line tools, however, things are different.
As mentioned earlier, your CLI application should ideally work with various PHP and dependency versions to maximise compatibility. This flexibility means you can't dictate which versions your users should instal, and instead let client environments figure out the dependency tree for themselves.
Note that you can commit this file – it will be ignored when your application is installed via Composer. But in practice, explicitly ignoring composer.lock best reflects real usage conditions, and forces you (and your team) to consider version variation early on.
By the way, if you'd like to know more about when to and when not to commit composer.lock, I published a Twitter thread on the subject:
A short thread on when to commit the composer.lock file in your PHP projects 👇
— Yannick (@osteel) November 29, 2021
Since we don't enforce specific dependency versions anymore, we need to define the range of versions our application will support. Open composer.json and update the require section as follows:
"require": {
    "php": "^8.0",
    "symfony/console": "^5.0|^6.0"
},
We need to specify the PHP version because down the line we won't know which versions our users are running. By making it explicit, Composer will then be able to check whether a compatible version of PHP is available and refuse to proceed with the installation if that's not the case.
Right now we're only interested in running a distribution test on our current machine though, so specifying your local PHP version is enough (adjust it if it's different from the above – if you're not sure, run php -v from a terminal).
You'll notice that I also added version 5.0 of the Console component – that's because while running my own tests, I experienced some compatibility issues with my local instance of Laravel Valet, which needed Console 5.0 at the time.
Based on when you're completing this tutorial, versions may have changed and this constraint may not be true anymore, but it's a good example of the kind of compatibility issues you may have to deal with.
There's one last change we need to make to this file, and that is the addition of a bin section:
"require": {
    "php": "^8.0",
    "symfony/console": "^5.0|^6.0"
},
"bin": [
    "bin/demo"
],
This is how you specify the vendor binary, which is a way to tell Composer "this will be the application's entry point, please make it available in the user's vendor/bin directory". By doing so, our users will be able to call our application globally.
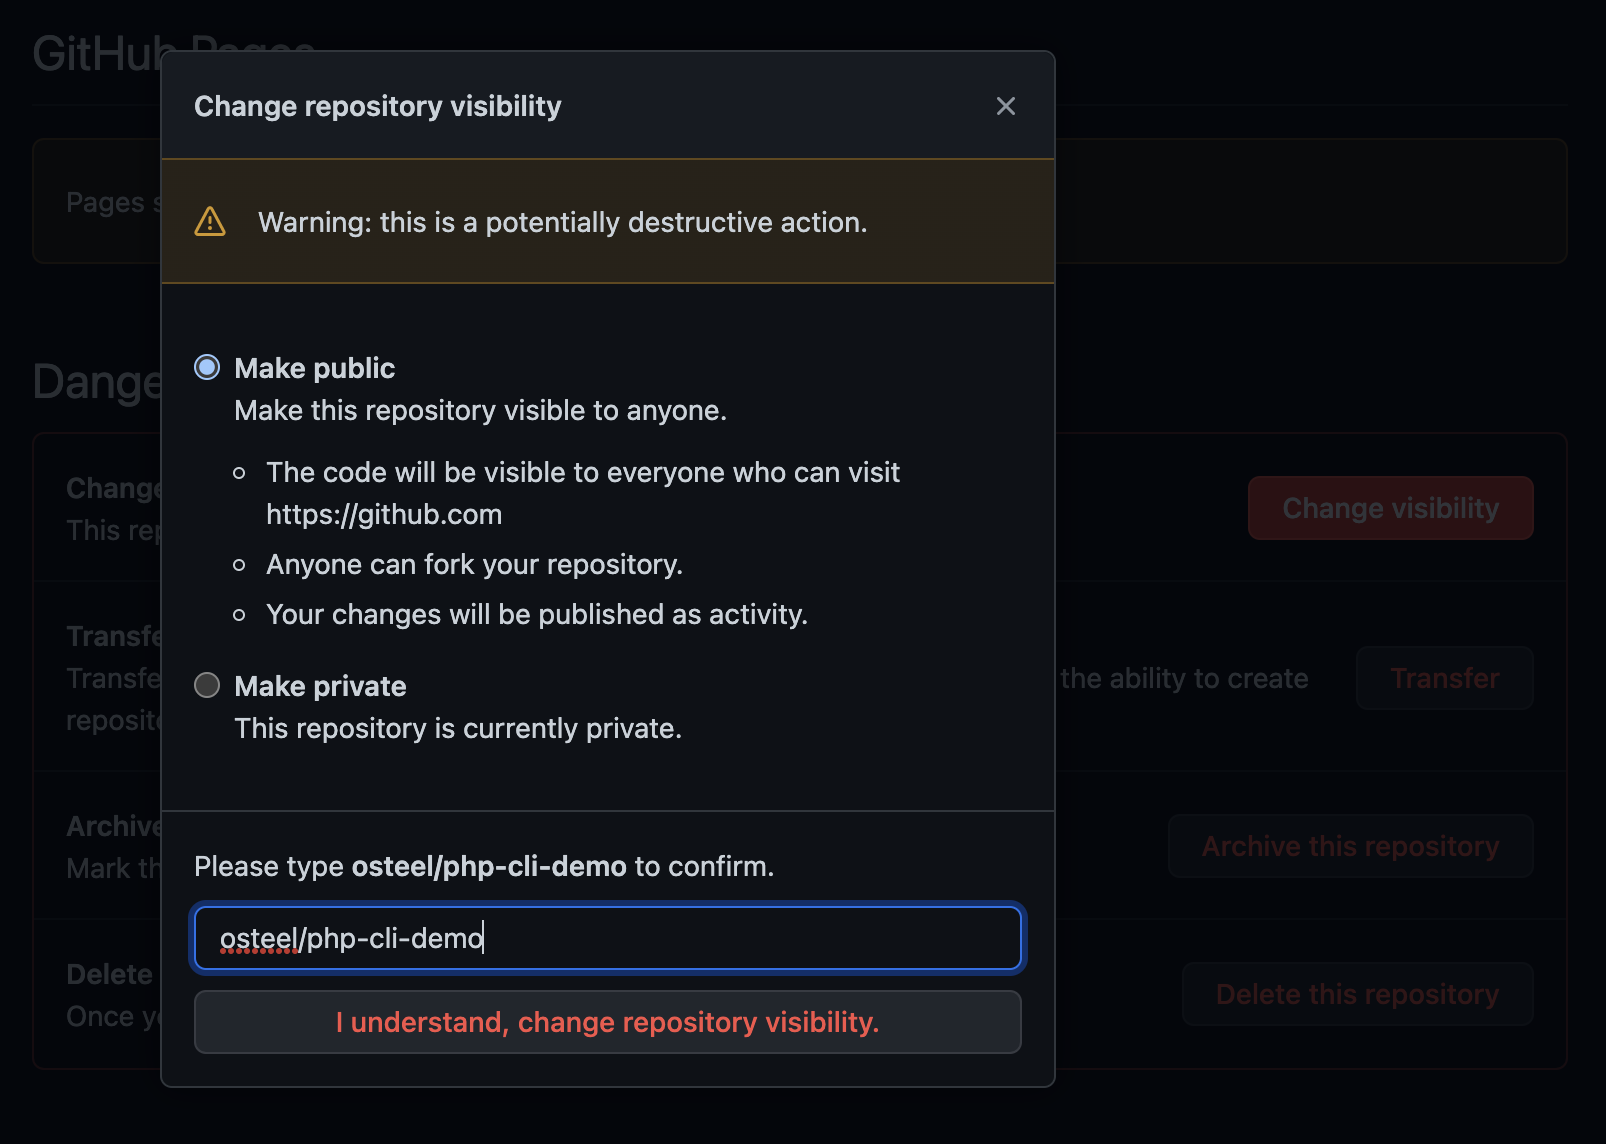
Commit and push the above changes. Then, if your repository was private so far, now is the time to make it public. Go to the Settings tab, enter the Options section, and scroll all the way down to the Danger Zone (which always reminds me of Archer).
There you can change the repository's visibility to public:
Now head over to packagist.org and create an account (or sign in if you already have one).
Once you're logged in, click the Submit button in the top right corner and submit the URL of your repository. Allow a few moments for the crawler to do its job and your repository will appear:
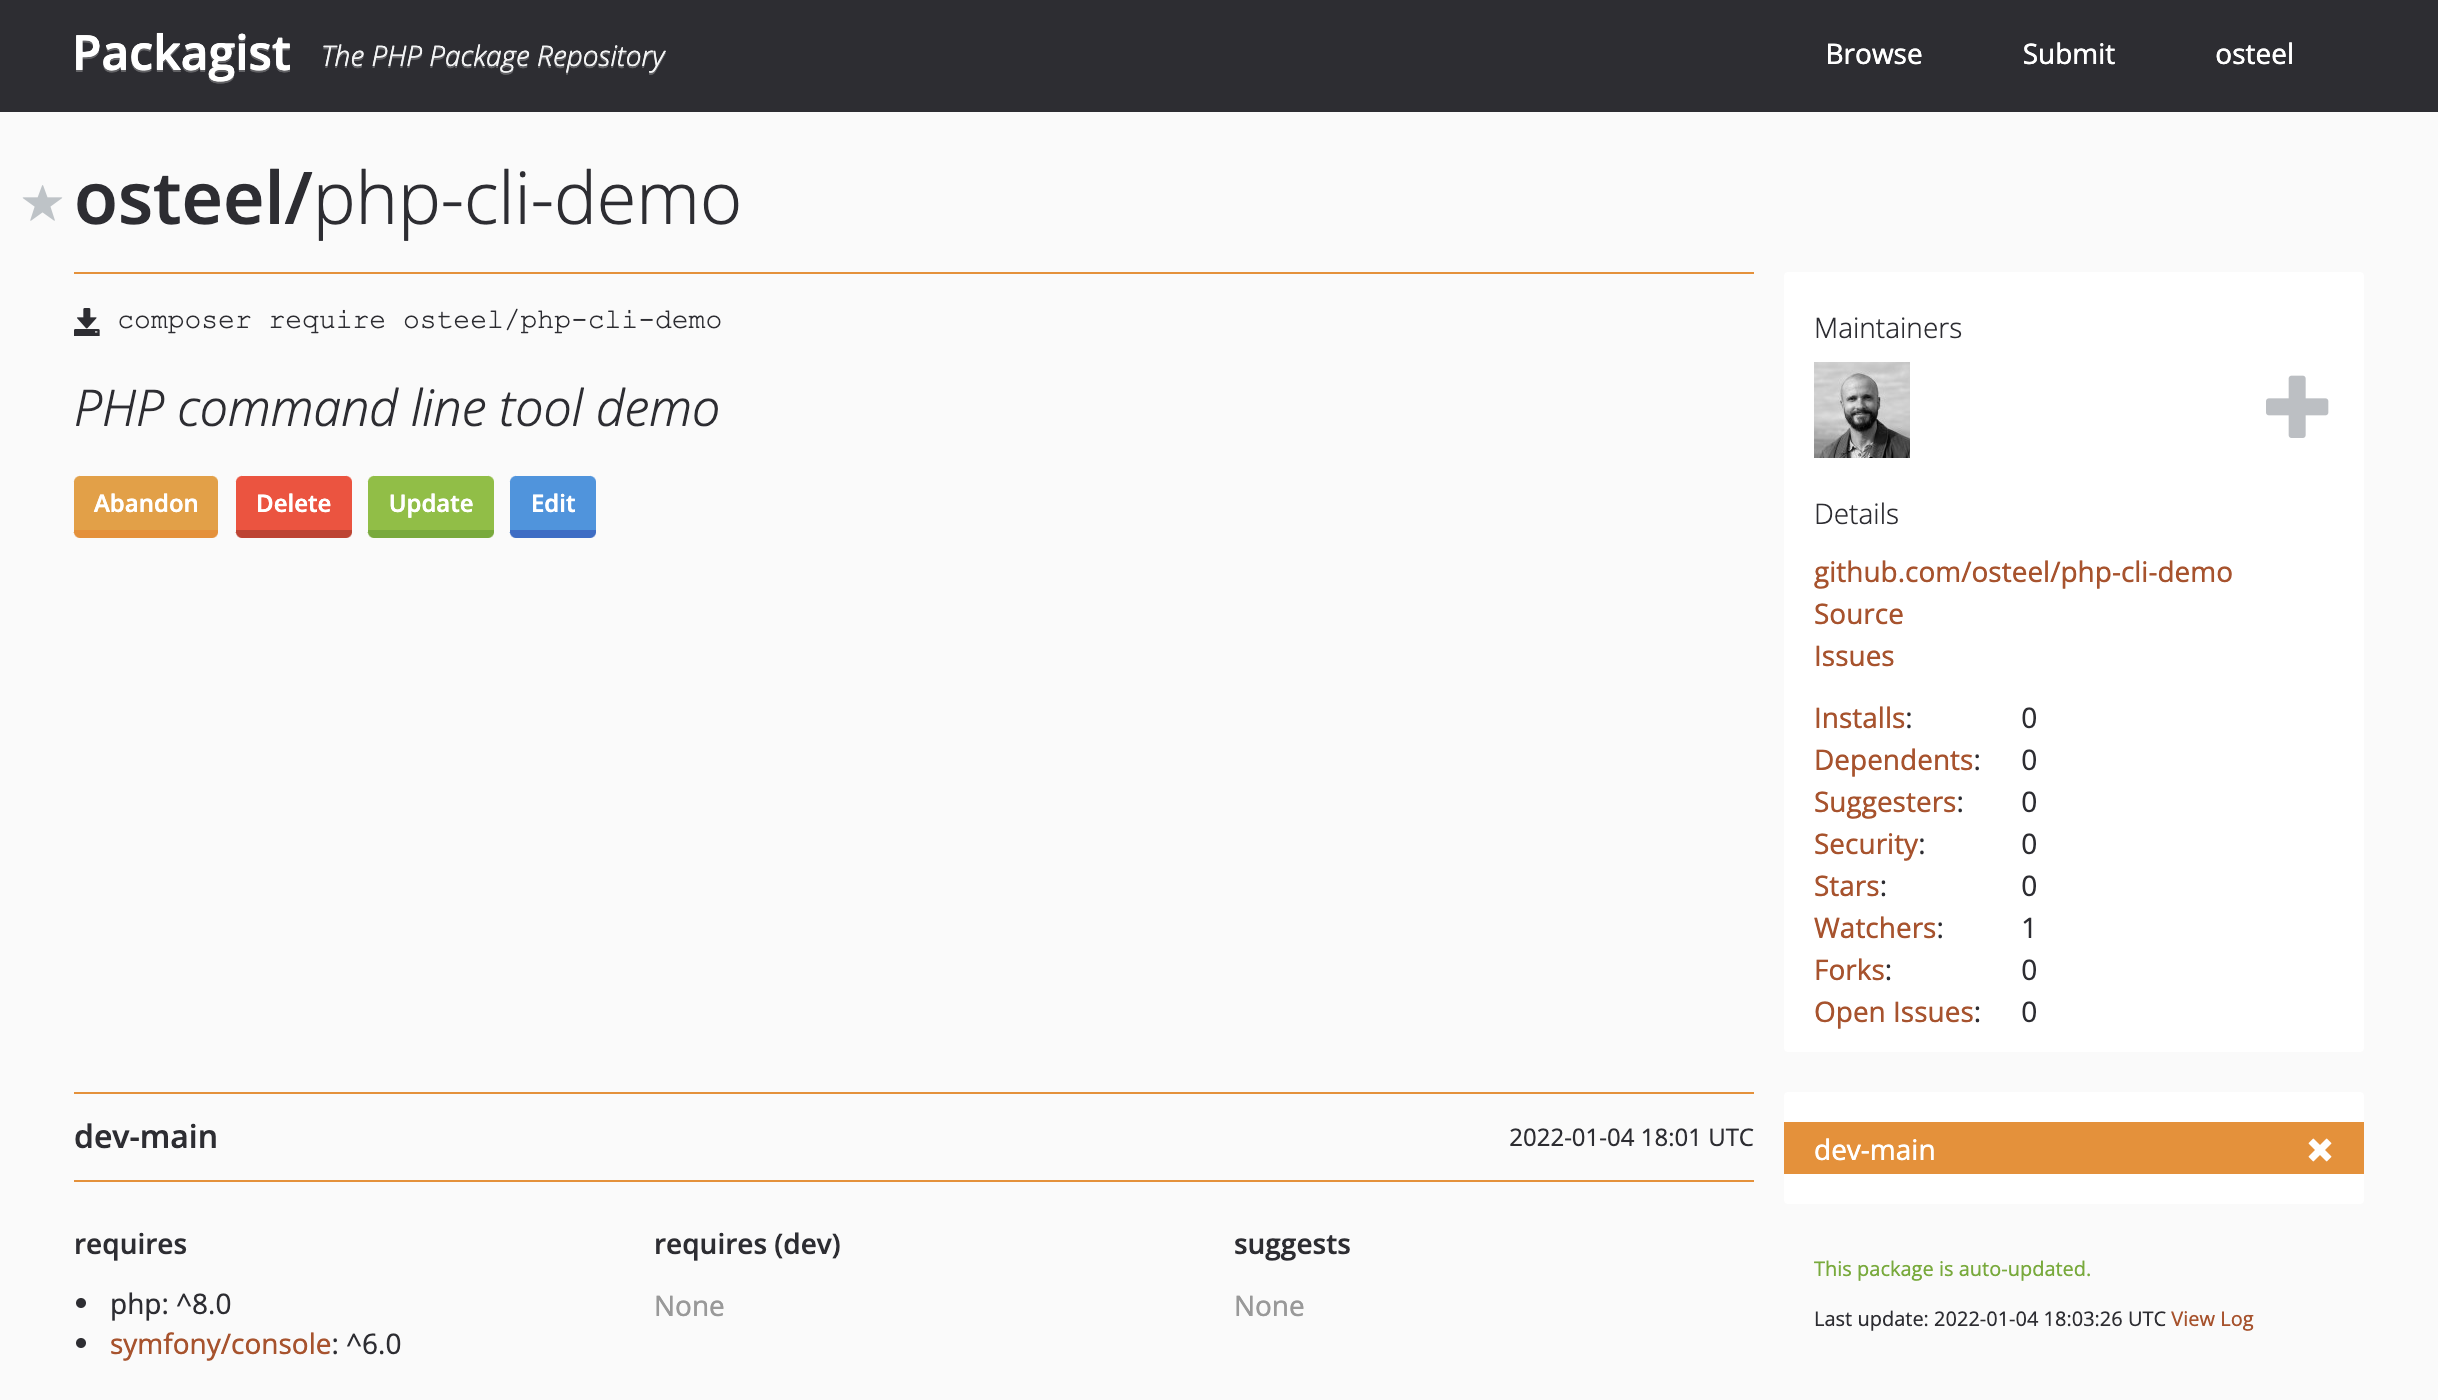
Don’t worry too much about publishing a dummy package – the worst that can happen is that no one but yourself will instal it (and you will be able to delete it later anyway).
Let's now try and instal it on your machine. Go to your terminal and run the following command:
$ composer global require osteel/php-cli-demo:dev-main
Then again, make sure to set the right vendor name. Notice the presence of :dev-main at the end – this is a way to target the main branch specifically, as there is no release available yet.
Once the instal is successful, make sure that the system recognises your application (you may need to open a new terminal window):
$ which demo
This command should return the path to your application's entry point (the demo file). If it doesn't, make sure the ~/.composer/vendor/bin directory is in your system's PATH.
Give the game a quick spin to ensure it behaves as expected:
$ demo play
Our distribution test is successful!
PHP version support
Before we carry on and publish a proper release, we need to tackle something we've now mentioned a few times – PHP version support.
This will be a two-step process:
- Write a test that controls the correct end-to-end execution of our program
- Add a GitHub workflow that will run the test using various PHP versions
Automated test
We will use PHPUnit as our testing environment – let's instal it as a development dependency:
$ composer require --dev phpunit/phpunit
Create the folders tests and tests/Commands at the root of the project and add a PlayTest.php file to the latter, with the following content:
1 2 3 4 5 6 7 8 9 10 11 12 13 14 15 16 17 18 19 20 21 | <?php
namespace Osteel\PhpCliDemo\Tests\Commands;
use Osteel\PhpCliDemo\Commands\Play;
use PHPUnit\Framework\TestCase;
use Symfony\Component\Console\Tester\CommandTester;
class PlayTest extends TestCase
{
public function testItDoesNotCrash()
{
$command = new Play();
$tester = new CommandTester($command);
$tester->setInputs([10, 'yes', 10, 'no']);
$tester->execute([]);
$tester->assertCommandIsSuccessful();
}
}
|
As usual, make sure to update the vendor in the namespace and use statement.
As per the documentation, the Console component comes with a CommandTester helper class that will simplify testing the Play command.
We instantiate the latter and pass it to the tester, which allows us to simulate a series of inputs.
The sequence is as follows:
- Answer
10to the first question - Say
yesto playing another round - Answer
10again - Say
noto playing another round
We then have the tester execute the command and check if it ran successfully using the assertCommandIsSuccessful method (which controls that the command returned 0).
And that's it. We're not testing the game's outputs – we're merely making sure that the program runs successfully given a series of inputs. In other words, we're ensuring that it doesn't crash.
Feel free to add more tests to control the game's actual behaviour (e.g. whether it gives the correct answers), but for our immediate purpose, the above is all we need.
Let's make sure our test is passing:
$ ./vendor/bin/phpunit tests

If it doesn't, go back a few steps or take a look at the tutorial's repository to check if you missed anything.
GitHub workflow
Now that we have a test controlling the correct execution of our program, we can use it to ensure the latter's compatibility with a range of PHP versions. Doing so manually would be a bit of a pain, but we can automate the process using GitHub Actions.
GitHub Actions allow us to write workflows triggering on selected events, such as the push of a commit or the opening of a pull request. They're available with any GitHub account, including the free ones (they come with a monthly allowance).
Workflows are in YAML format and must be placed in a .github/workflows folder at the root.
Create this folder and add the following ci.yml file to it:
1 2 3 4 5 6 7 8 9 10 11 12 13 14 15 16 17 18 19 20 21 22 23 24 25 26 27 28 29 30 31 32 33 34 35 36 37 | name: CI
on:
push:
branches: [main]
pull_request:
branches: [main]
jobs:
phpunit:
name: PHPUnit
runs-on: ubuntu-latest
strategy:
matrix:
php-version:
- "7.4"
- "8.0"
- "8.1"
- "8.2"
steps:
- name: Checkout
uses: actions/checkout@v3
- name: Setup PHP
uses: shivammathur/setup-php@v2
with:
php-version: ${{ matrix.php-version }}
coverage: none
- name: Install composer dependencies
uses: ramsey/composer-install@v2
- name: Run PHPUnit
run: vendor/bin/phpunit tests
|
At the very top of the workflow is its name ("CI" stands for Continuous Integration), followed by the events on which it should trigger, in the on section. Ours will go off anytime some code is pushed to the main branch, or whenever a pull request is open towards it.
We then define jobs to be executed, which in our case is just one – running the test. We specify that we'll use Ubuntu as the environment, and then define the execution strategy to apply. Here, we'll be using a matrix of PHP versions, each of which will run our test in sequence (the listed versions are the supported ones at the time of writing).
Finally, we define the steps of our job, that we break down as follows:
- Check out the code
- Set up PHP using the current version
- Instal Composer dependencies
- Run the test
We now need to list the same PHP versions in our application's composer.json so Composer won't refuse to instal it for some of them. Let's update the require section again:
"require": {
    "php": "^7.4|^8.0",
    "symfony/console": "^5.0|^6.0"
},
If you're wondering why I didn't list 8.1 nor 8.2, that's because as per the rules of Semantic Versioning (semver), ^8.0 covers all versions above or equal to 8.0 but strictly under 9.0, which includes 8.1 and 8.2. If you're like me and tend to forget the rules of semver when you need them, keep this cheatsheet handy and thank me later.
Save, commit and push the above – if it went well, you should see the workflow running in the Actions tab of your GitHub repository:
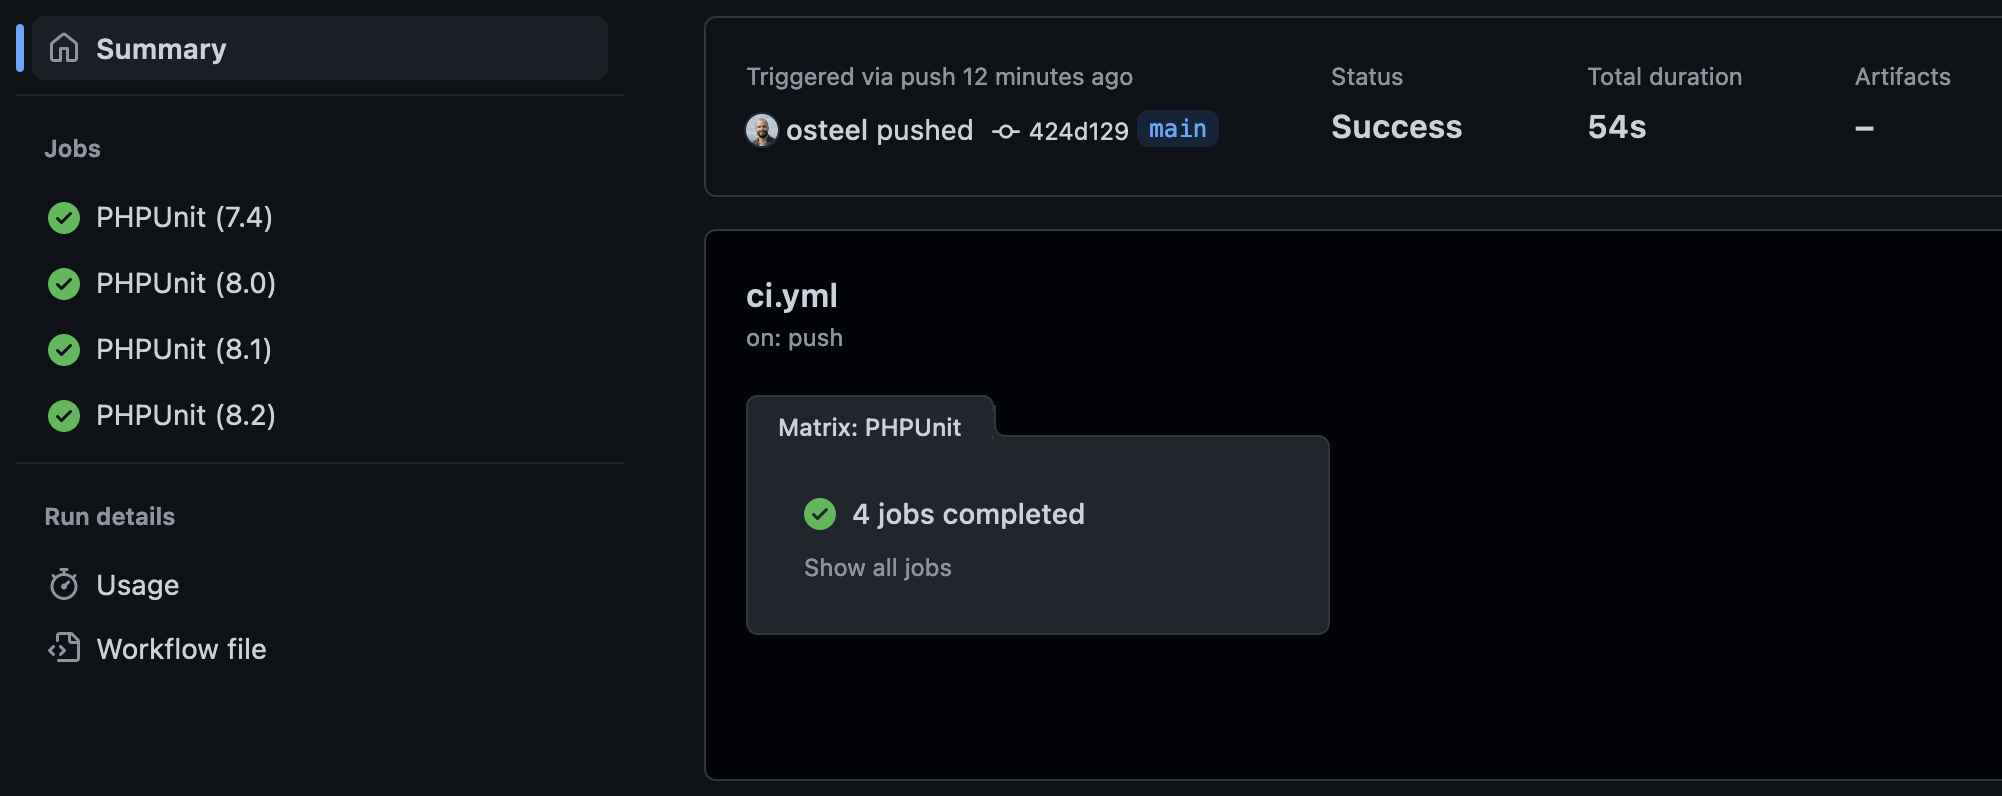
Then again, refer to the article's repository if something goes wrong.
This workflow gives us the confidence that our application will run successfully with any of the listed PHP versions, and will confirm whether this is still the case any time we push some changes.
A more complete workflow The above is a simplified workflow that doesn't quite cover all dependency versions. We can push the concept of matrix even further, but to avoid making this post longer than it already is, I've published a separate blog post dedicated to the topic.
Release
We now have a tested application that is compatible with a range of PHP versions and an early version of which we managed to instal on our machine. We're ready to publish an official release.
But before we do that, we need to ensure our future users will know how to instal and use our application – that's what README.md files are for.
Let's create one at the root of the project:
1 2 3 4 5 6 7 8 9 10 11 12 13 14 15 16 17 18 19 20 21 22 23 24 25 26 27 28 29 30 31 32 33 34 35 36 37 38 39 40 41 42 43 44 45 46 47 48 49 50 51 52 53 54 55 56 57 58 59 60 | <h1 align="center">PHP CLI Demo</h1>
<p align="center">PHP command-line tool demonstration</p>
<p align="center">
<img alt="Preview" src="/art/preview.png">
<p align="center">
<a href="https://github.com/osteel/php-cli-demo/actions"><img alt="Build Status" src="https://github.com/osteel/php-cli-demo/workflows/CI/badge.svg"></a>
<a href="//packagist.org/packages/osteel/php-cli-demo"><img alt="Latest Stable Version" src="https://poser.pugx.org/osteel/php-cli-demo/v"></a>
<a href="//packagist.org/packages/osteel/php-cli-demo"><img alt="License" src="https://poser.pugx.org/osteel/php-cli-demo/license"></a>
</p>
</p>
## Instal
This CLI application is a small game written in PHP and is installed using [Composer](https://getcomposer.org):
```
composer global require osteel/php-cli-demo
```
Make sure the `~/.composer/vendor/bin` directory is in your system's `PATH`.
<details>
<summary>Show me how</summary>
If it's not already there, add the following line to your Bash configuration file (usually `~/.bash_profile`, `~/.bashrc`, `~/.zshrc`, etc.):
```
export PATH=~/.composer/vendor/bin:$PATH
```
If the file doesn't exist, create it.
Run the following command on the file you've just updated for the change to take effect:
```
source ~/.bash_profile
```
</details>
## Use
All you need to do is call the `play` command to start the game:
```
demo play
```
## Update
```
composer global update osteel/php-cli-demo
```
## Delete
```
composer global remove osteel/php-cli-demo
```
|
This is a basic template mixing some HTML and markdown code. I won't spend too much time explaining it, so here is a quick summary of the content:
- Title and subtitle
- Preview image
- Some badges
- Installation instructions
- Usage instructions
- Update instructions
- Deletion instructions
You'll need to replace instances of osteel with your vendor name again (and maybe some other things like the application name or entry point if you chose something other than demo).
For the preview image I like to take a simple screenshot of the application being used:

This is also the image I used to illustrate this post
Create an art folder at the root of the project and place a preview.png image in it (update the code accordingly if you pick a different name).
You can also use this picture for social media by setting it in the Social preview section of the repository's Settings tab.
That's pretty much it – feel free to reuse and adapt this template as you please.
Save and push README.md, and head over to the repository's Releases section, available from the column on the right-hand side:

Create a tag for your release, which should follow the rules of Semantic Versioning. We'll make ours version 1:
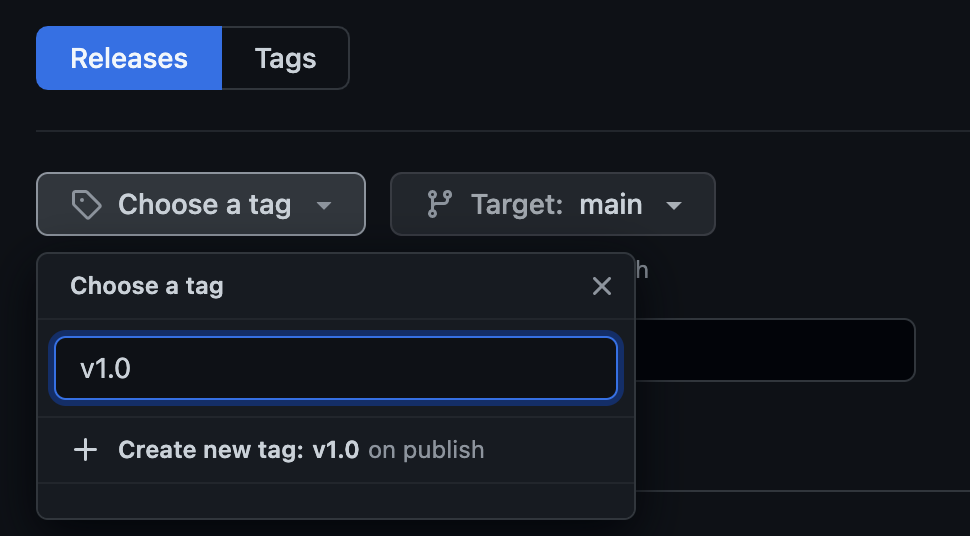
Give your release a name and a description and publish it:
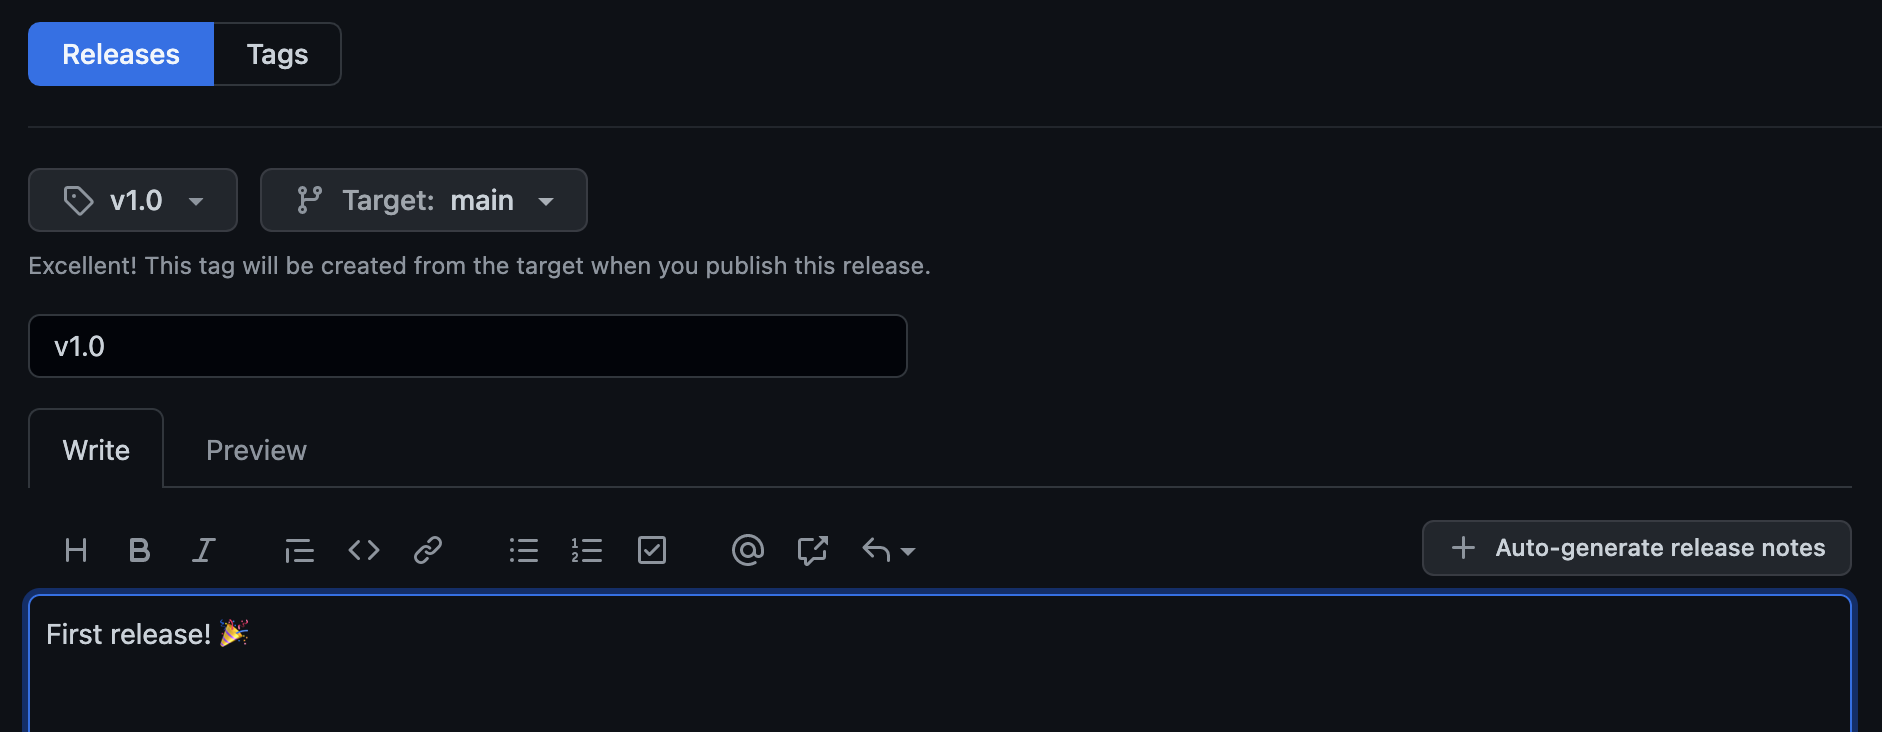
After a few moments, you should see it appear on the Packagist page of your repository:

Now go back to your terminal and run the following command (using the appropriate vendor name):
$ composer global require osteel/php-cli-demo
Now that a proper release is available, there's no need to append :dev-main anymore.
Make sure you can still play the game:
$ demo play
And that's it! Your application is now ready to be advertised and distributed.
You can instal future minor releases by running the following command:
$ composer global update osteel/php-cli-demo
And major ones with the following:
$ composer global require osteel/php-cli-demo
Cleaning up
This tutorial is drawing to an end and if after playing with your application you feel like cleaning up after yourself, you can delete your package from Packagist:
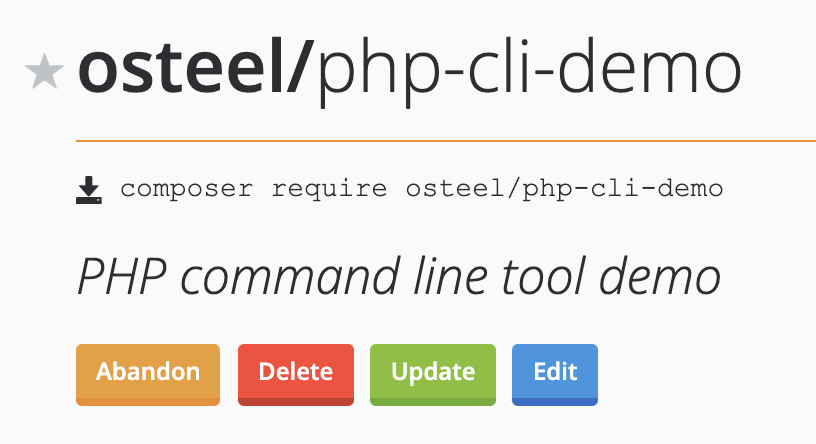
And this is how you'd remove it from your local system:
$ composer global remove osteel/php-cli-demo
Of course, you can also delete your GitHub repository at any time.
Conclusion
I hope this will inspire you to write your own command-line tools in PHP.
While the language's primary application remains for web development, the above should show that it's versatile enough to assist you in other ways.
Let's be honest – if your goal is the widespread use of a standalone CLI application, PHP is probably not the best language. Users would still need an environment that supports it, a local instal of Composer, and also to edit their local PATH to include Composer's bin directory. These are all steps that most people won't be comfortable taking.
But if you're already a PHP developer, your environment is very likely to satisfy these conditions already, and as a result, the barrier to building your own CLI tools is very low.
Think of repetitive tasks that you perform regularly, and that could be automated away without the need of a full-blown website. I, for instance, grew tired of having to manually import my Kobo annotations to Readwise, so came up with a tool to make the conversion easier.
PHP has no issue running system commands and if you need more muscle than what the Console component alone has to offer, frameworks like Laravel Zero will greatly expand the realm of possibility.
You don't necessarily have to distribute your programs via Packagist for a strictly personal use, but it's a way to share your work with others who might have similar needs and a potential foray into open-source development.
Besides, the process of writing and distributing your own CLI tools is not so dissimilar to that of application libraries – once you're comfortable with the former, the latter becomes more accessible, and both are ways to give back to the community.
Resources
Here are some of the resources referenced in this post:
- Article repository
- Composer documentation
- Symfony's Console component documentation
- Choose an open source license
- Why is it better to use "#!/usr/bin/env NAME" instead of "#!/path/to/NAME" as my shebang?
- Appendix E. Exit Codes With Special Meanings
- Type variance in PHP
- PHP's dirname function
- PHP Supported Versions
- PHPUnit
- Continuous Integration
- GitHub Actions
- Packagist.org
- Semantic Versioning
- Semantic Versioning Cheatsheet
- How to add composer vendor bin directory to path
- Minicli
- Laravel Zero
- Termwind
You can also subscribe to the RSS or Atom feed, or follow me on Twitter.