Docker for local web development, part 6: expose a local container to the Internet
Last updated: 2020-12-17 :: Published: 2020-05-11 :: [ history ]You can also subscribe to the RSS or Atom feed, or follow me on Twitter.

In this series
- Introduction: why should you care?
- Part 1: a basic LEMP stack
- Part 2: put your images on a diet
- Part 3: a three-tier architecture with frameworks
- Part 4: smoothing things out with Bash
- Part 5: HTTPS all the things
- Part 6: expose a local container to the Internet ⬅️ you are here
- Part 7: using a multi-stage build to introduce a worker
- Part 8: scheduled tasks
- Conclusion: where to go from here
Subscribe to email alerts at the end of this article or follow me on Twitter to be informed of new publications.
In this post
Introduction
While using Docker for local development allows us to replicate a production environment as closely as possible in a self-contained way, in some instances exposure to the outside world is unavoidable.
Typical use cases include testing a third-party service's webhook (like a transaction confirmation from a payment gateway), or showing a project's advancement to a client. Sure, you could use a staging environment for that, but you might not be in a position to offer one, and in some cases it would feel akin to squashing a fly with a sledgehammer.
Wouldn't it be more practical if you could make your local environment public instead?
Thankfully, this isn't a new issue and several services offer to address it. This article focuses on one that's arguably become a reference over time: Ngrok.
The assumed starting point of this tutorial is where we left things at the end of the previous part, corresponding to the repository's part-5 branch.
If you prefer, you can also directly checkout the part-6 branch, which is the final result of today's article.
Ngrok
Ngrok is an online service that essentially allows developers to create secure tunnels to channel traffic from a public URL to a local address. It offers paid plans but also comes with a generous free version that doesn't even require an account for HTTP tunnels. Since our setup runs on HTTPS, however, we'll need to sign up in order to obtain an authentication token. Don't worry though, it only takes a few seconds and doesn't require credit card details.
If you really don't want to open an account, there will be an information box towards the end of this tutorial explaining how to use the subscription-free plan instead.
Installing and configuring
There is no official Docker image for Ngrok, but the community stepped up and made a few of them available.
We'll use Werner Beroux's today, for which we need to create a service in docker-compose.yml:
1 2 3 4 5 6 7 8 9 10 11 | # Ngrok Service
ngrok:
image: wernight/ngrok:latest
ports:
- 4040:4040
environment:
NGROK_PROTOCOL: http
NGROK_PORT: nginx:443
NGROK_AUTH: ${NGROK_AUTH}
depends_on:
- nginx
|
Ngrok comes with an interface served on the container's port 4040 which we mapped to localhost's, and since Nginx will once again be our entry point for the traffic, we made sure its container is started before Ngrok's using depends_on.
That leaves us with a bunch of environment variables:
NGROK_PROTOCOLcan either behttportcp– in our case, we need the former;NGROK_PORTis a bit misleading, as it's actually not only the port but also the host, which isnginx:443in our case (if no host is specified, localhost is implied);NGROK_AUTHis the authentication token I mentioned earlier, whose value is another environment variable that we'll set in a minute.
That's all we need for today, but you might want to have a look at the other environment variables listed in the image's documentation.
We now need to set the authentication token, which you will find in your dashboard. If you remember, in the first part of this series we created a .env file at the root of the project, alongside docker-compose.yml. So far we've only used it to specify a project name (to avoid container name collisions with other projects), but that's also where we'll set the token.
Open the file and change its content to this one, replacing the <YOUR TOKEN> placeholder with... your token:
COMPOSE_PROJECT_NAME=demo
NGROK_AUTH=<YOUR TOKEN>
For good measure, we should also update .env.example, to make it clear for future users that a value is expected:
COMPOSE_PROJECT_NAME=demo
NGROK_AUTH=
This gives you the flexibility to either set a token in .env.example for everyone to use, or to ask each developer to create their own Ngrok account and complete their local .env file accordingly.
Of course, you could set the token in docker-compose.yml directly, but I wanted to show you another way to use the project's .env file.
The last thing we need to do is to update the Nginx server configuration in .docker/nginx/conf.d/backend.conf:
server {
    listen      443 ssl http2;
    listen      [::]:443 ssl http2;
    server_name backend.demo.test *.ngrok.io;
    root        /var/www/backend/public;
    ...
Only the bit in bold needs to be added, the rest of the file remains as it is. Save it and restart the project in order to create the Ngrok container and to reload the Nginx configuration:
$ demo restart
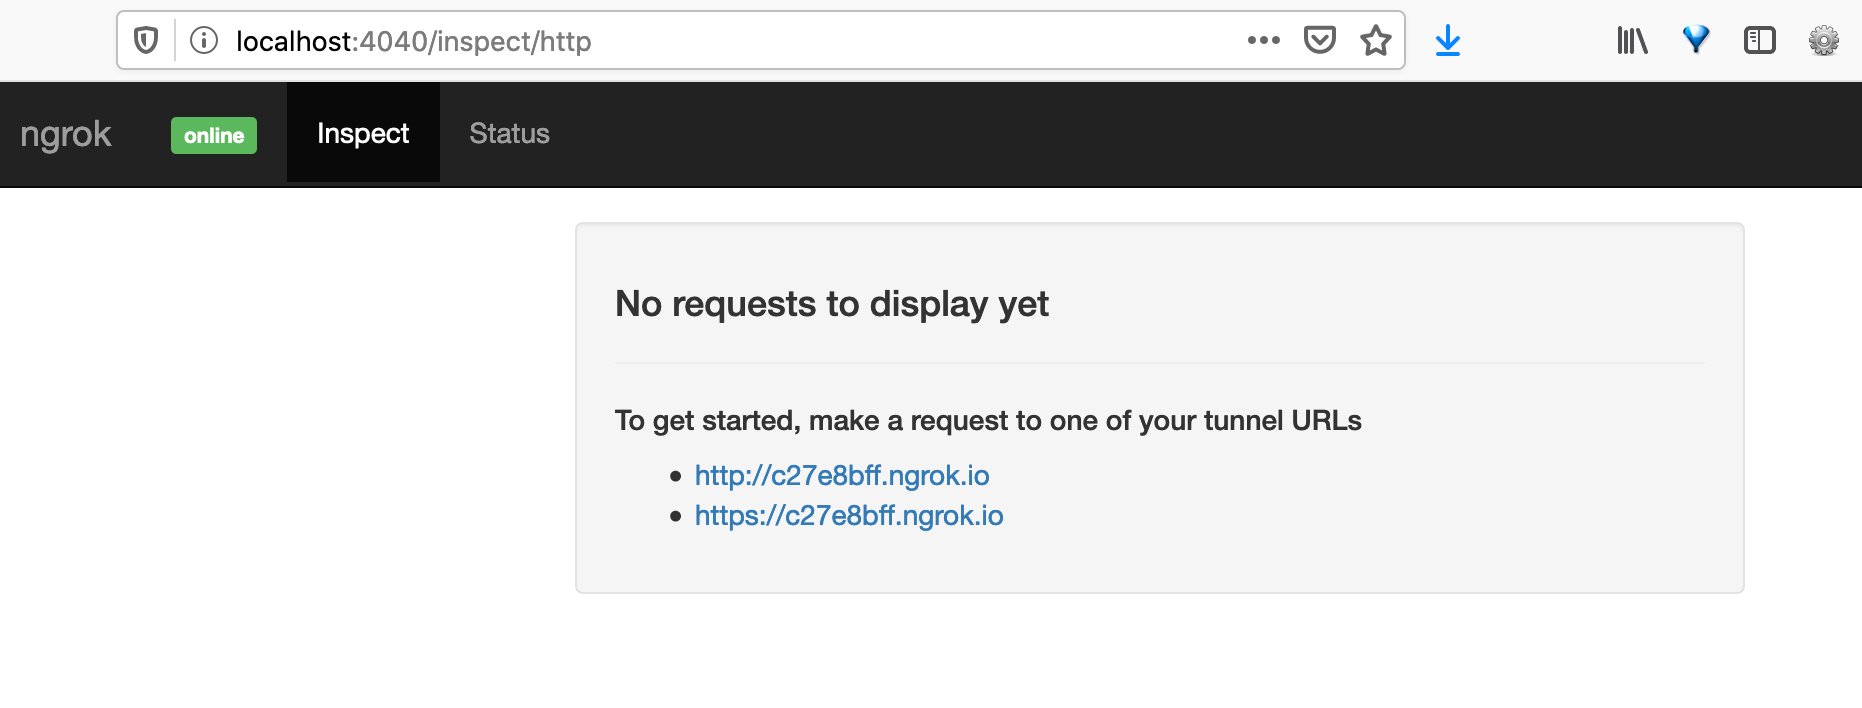
Open localhost:4040 in your browser:

Two URLs are available – spot the HTTPS one and open it in a new tab, appending /api/hello-there to the end:

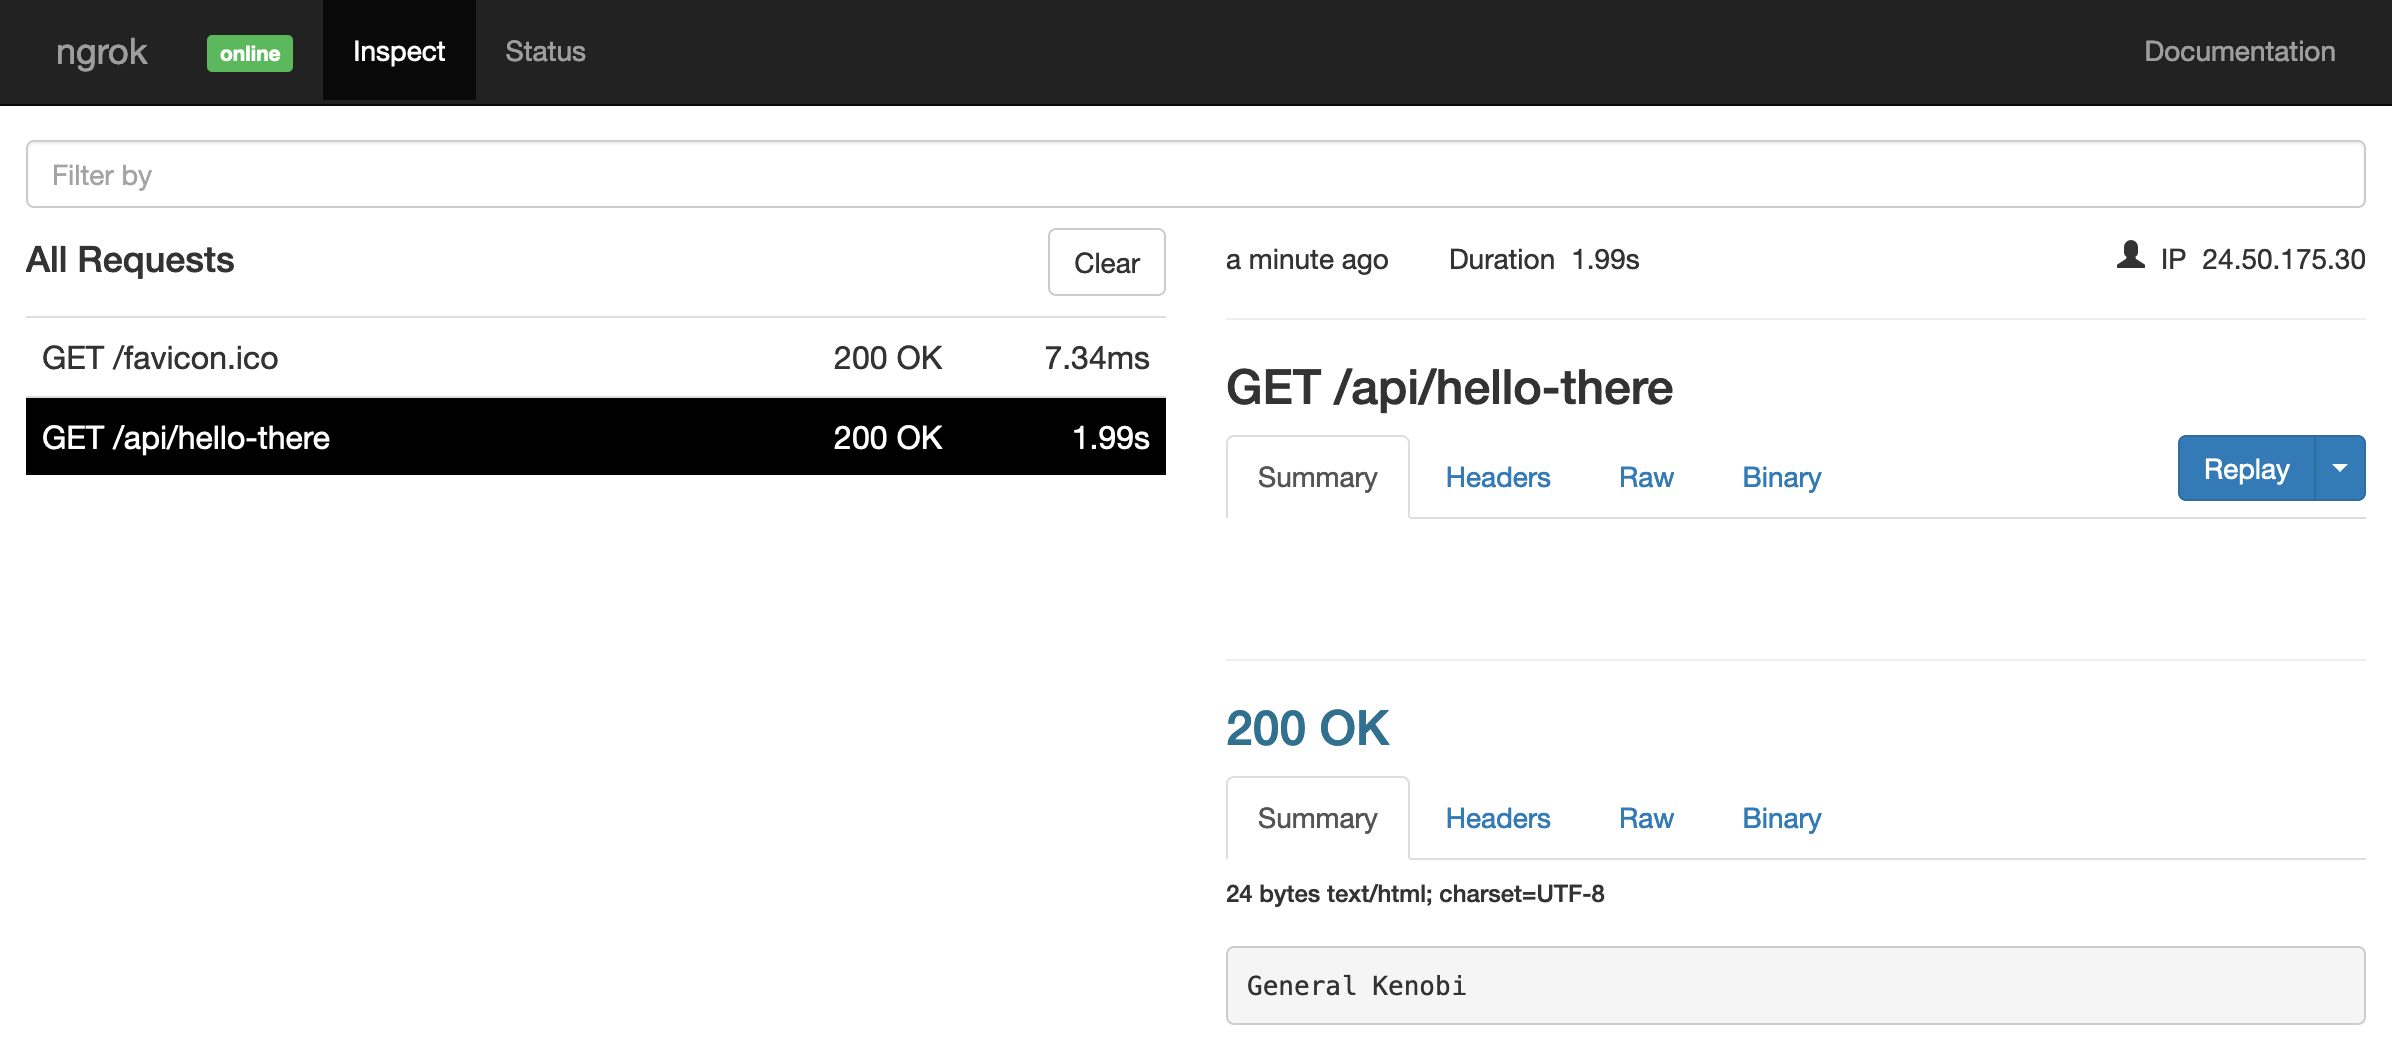
Our API is now available publicly! Now go back to the other tab – you should see something like this:

You can now use that URL with third-party services or distribute it as much as you want, as long as the Ngrok container is running. The corresponding traffic will appear in the interface, where you can inspect it and replay requests at will. Handy!
There's only one little downside: the URL will expire after 8 hours, and it will change every time the Ngrok container is restarted. That's always been fine by me as I usually need tunnels for quick tests only, but you can always look into the paid plans if that's an issue for you – they come with custom and permanent subdomains, among other things.
Don't want to open an account?If you really don't want to subscribe, you can use the account-free version instead, but you will need to make the backend available on port 80. To do so, change port 443 to port 80 in the Ngrok service in docker-compose.yml and remove the NGROK_AUTH environment variable. Create a server block dedicated to *.nginx.io in the backend.conf Nginx configuration, listening on port 80 instead of port 443. Restart the project, and you should be able to use the HTTP URL provided by Ngrok.
Conclusion
That's it! That's all it takes to make a local container available to the Internet.
This article once again demonstrates how easy it can be to leverage a piece of technology in minutes with Docker, with no prior knowledge. There's no need to worry about messing up the installation or cluttering your local setup – as long as there's a Docker image for it (and most popular technologies have one), it doesn't take much to give it a go, quickly and safely.
This is also a good example of when it is OK to rely on the community, whenever the software issuer or core team hasn't provided an image yet (that is not to say that it is usually a bad idea to trust the community, simply that if there is an official image available, you're probably better off using it instead).
In the next article, we'll talk about another key Docker concept: multi-stage builds. We'll use it to create a worker for our API, to listen to and consume messages from a queue.
You can subscribe to email alerts below to make sure you don't miss it, or you can also follow me on Twitter where I will share my posts as soon as they are published.
You can also subscribe to the RSS or Atom feed, or follow me on Twitter.